Add Tank Rent Information
Here's how to add rental information to an existing tank. This process begins by finding the account containing the tank you're looking for.
1. Find the account with the tank you want to add rental information to by using one of the following:
People Associated with an Account
2. Regardless of how you get to the account, the detail account screen for that customer will be displayed.
3. Left-click the .gif) tab located near the top of the window.
tab located near the top of the window.
4. Left-click the  tab located near the bottom of the window.

This "Rental Info" tab will NOT show unless this is a company owned tank (this makes sense since you can't rent something you don't own).

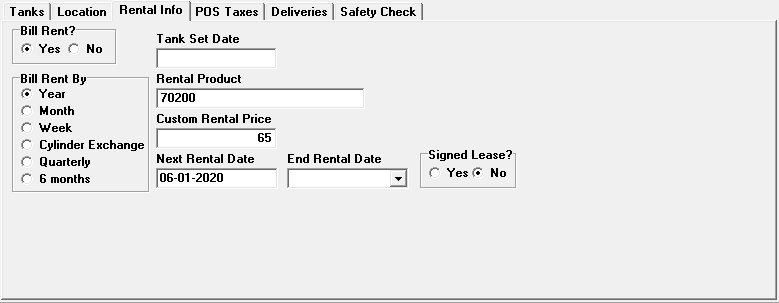
5. This will display this window where you can see what rent (if any) is already set up for this tank:
6. Left-click the  button which will display the tank change window.
7. Left-click on the  tab which will display the tank rent change window.
8. Cursor to the field(s) you want to add or use the drop-down arrows  to select the appropriate tank rent information for
this tank.
to select the appropriate tank rent information for
this tank.
If you want to use a "custom" rental price for this particular customer (rather than setting up a new Rental Product and/or a new price), enter this amount in thetext box. This will then override the "normal" Rental Product price when you do the next billing for this rent.
9. When you're done, left-click the  button to return to the account
window with the TANK(S) tab active.
button to return to the account
window with the TANK(S) tab active.