Set Product Costs on Products
Here's how to enter a cost for a selected period of time for a selected product(s). If you want to set costs for price codes, go to Set Product Cost on Price Codes.
IMPORTANT: This procedure does NOT automatically make a Journal Entry for you. Instead, it simply makes your Sales Report COGS columns reflect the proper COGS amounts.
From the Lynx Main Menu . . .
1. Left-click on Inventory.
2. A drop-down menu will appear.
3. Left-click on Set Product Cost.
4. This will display the Set Product Cost window.
5. Left-click the  tab (if it's not already active).
6. Complete the following five steps to set a cost for a given Product for a selected period of time.
-
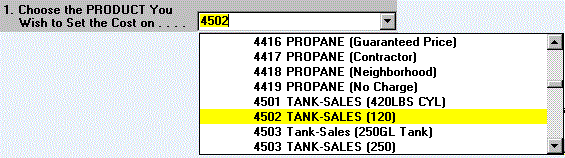
Left-click the down arrow
 to display a
drop-down list of Products. Left-click the one you want to enter a cost for, like this:
to display a
drop-down list of Products. Left-click the one you want to enter a cost for, like this:
-
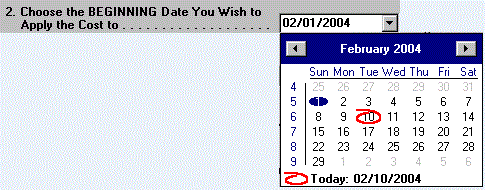
Left-click the down arrow
to display a
drop-down calendar. Select the beginning date you want the cost to
take effect, like this:
-
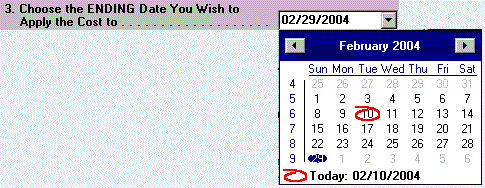
Left-click the down arrow
to display a
drop-down calendar. Select the ending date you want the cost to take
effect, like this:
-
Key in the cost you want to use for this Product for the selected period of time, like this:

-
Click the
 button to apply the cost you just entered.

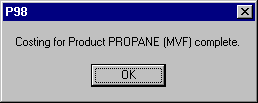
7. After a few seconds, this message will appear to indicate the cost you entered has been applied.
8. Left-click the  button. If you want to set more costs, go back to step 6.
9. When you're all done, left-click the close button  to return to the Lynx Main
Menu.
to return to the Lynx Main
Menu.